
Docker image for developing chat bots using Microsoft Bot Framework v4 SDK. This developer base image for BotBuilder V4 should make life easier to isolate the development environment when you shuffle between multiple projects and its dependencies.
Overview
In this post, I’ll be sharing about two key things,
- How to create a new bot in the Docker container
- How to run existing projects inside Docker container aka dockerize existing bot framework project
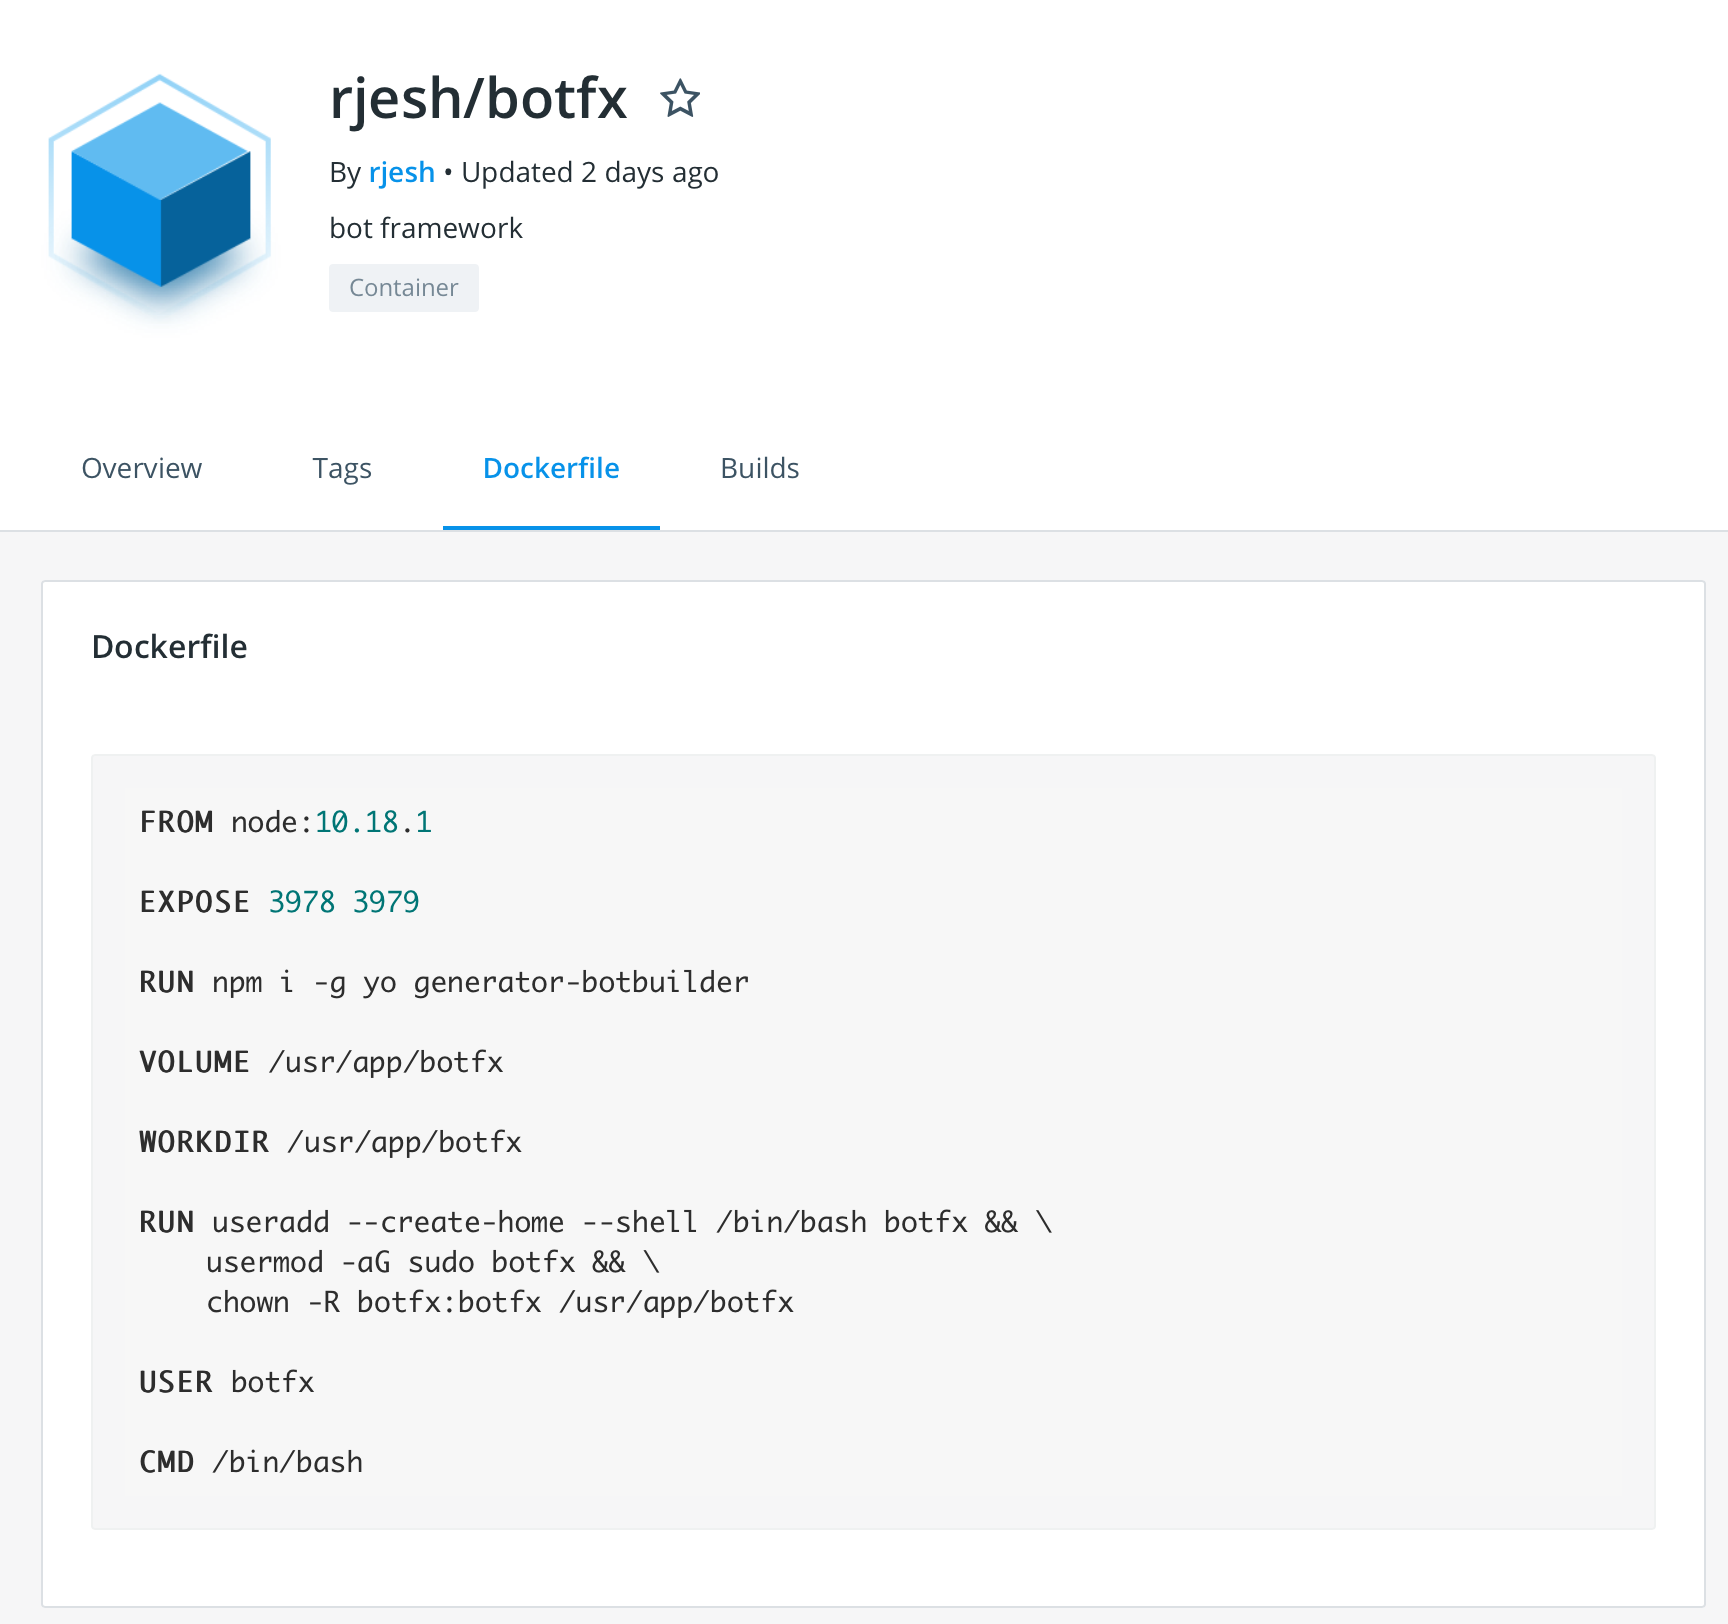
For the above, I’ll be using the Docker image - rjesh/botfx which I built with the pre-requisites for Microsoft Bot Framework project and published in the Docker hub. For time being this image only supports the NodeJS based project (JavaScript and TypeScript).
Before we get started with the details, I assume you have already installed the Docker engine in your development machine and you have fair understanding on the concepts Docker image and containers.
Pull image from Docker Hub
- Make sure that the Docker engine in running and run the below in the terminal/command prompt
- Pull Docker image from the Docker hub.
1
 docker pull rjesh/botfx
Section #1 - Create new bot in Docker container
Let’s create a new bot in the Docker container with the below steps, we are not going to install any of the dependencies like NodeJS, Yeoman generator and BotBuilder in the host machine.
Open the terminal and create new folder for the project.
1
2
3
# Create project folder to be mounted from host as volume
mkdir [project]
cd [project]
Launch the container, using the below command. MacOS:
1
docker run -it --rm --name ${PWD##*/} -v $PWD:/usr/app/botfx -p 3978:3978 rjesh/botfx
Windows:
1
docker run -it --rm --name [project-folder] -v /c/src/[project-folder]:/usr/app/botfx -p 3978:3978 rjesh/botfx

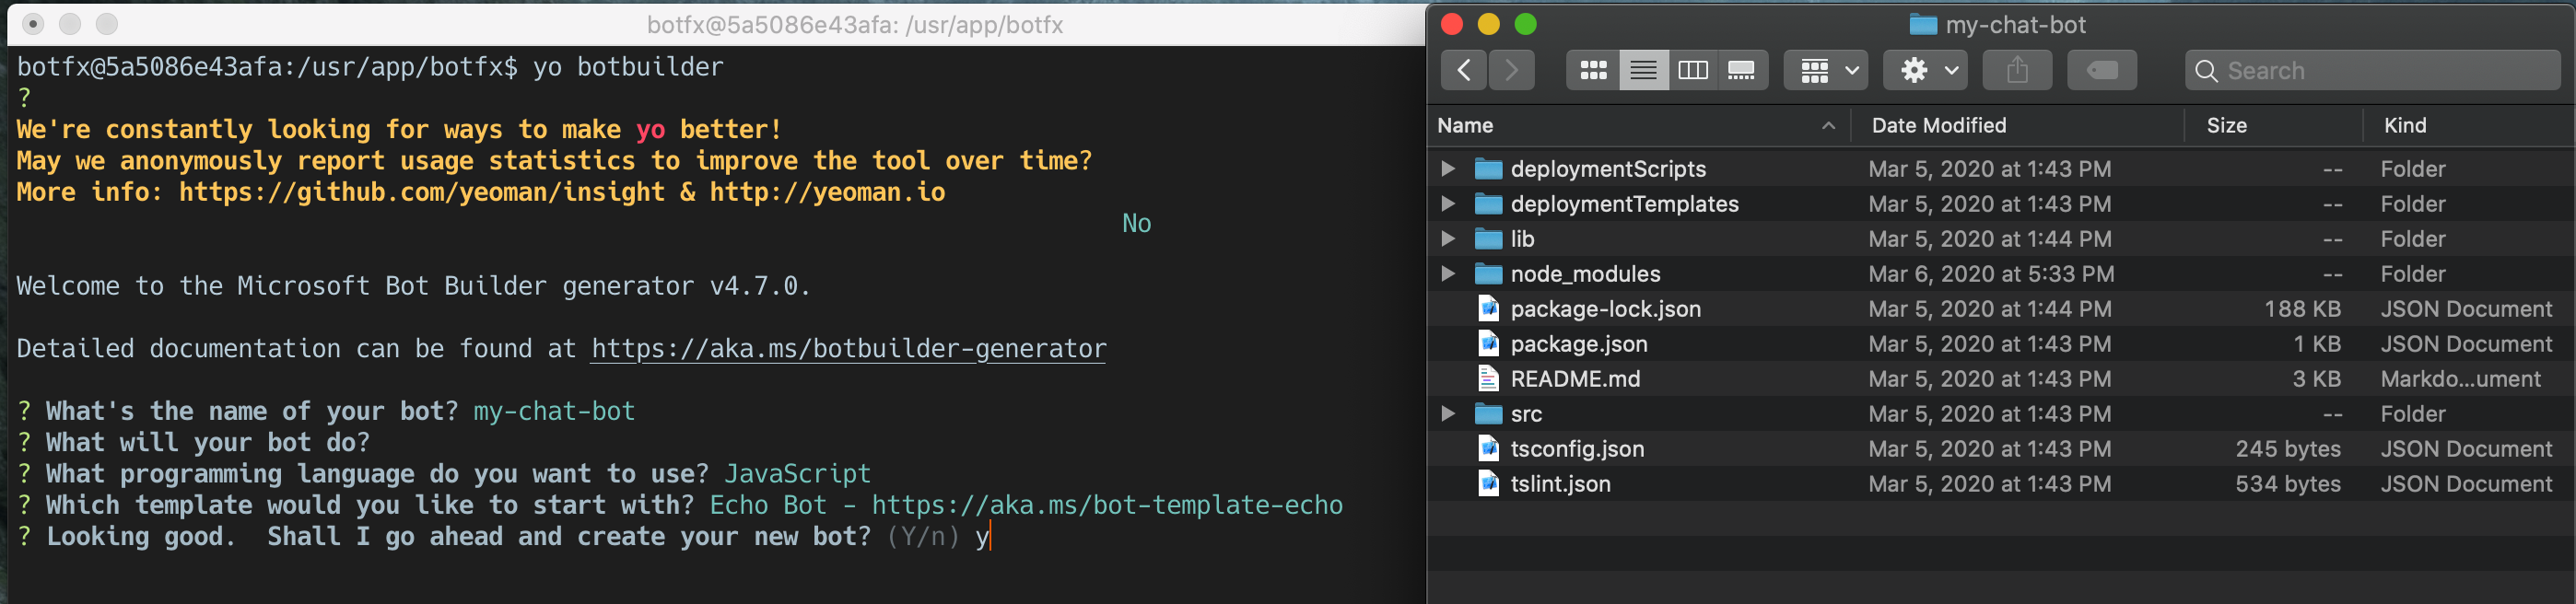
Your container should be ready now, lets create the project using the Yeoman generator botbuilder.
1
2
# Run the bot in interactive mode
yo botbuilder
Once the project is created, you can run the project by using the below command
1
2
cd [project]
npm start
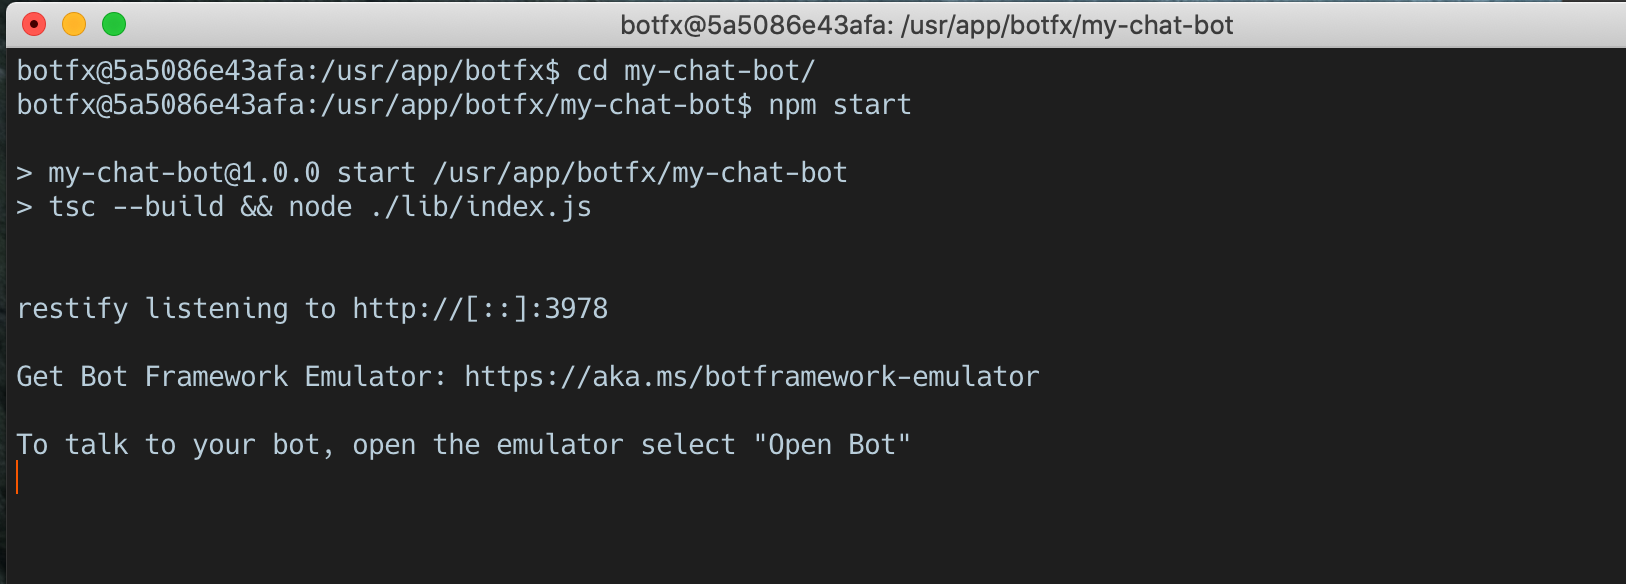
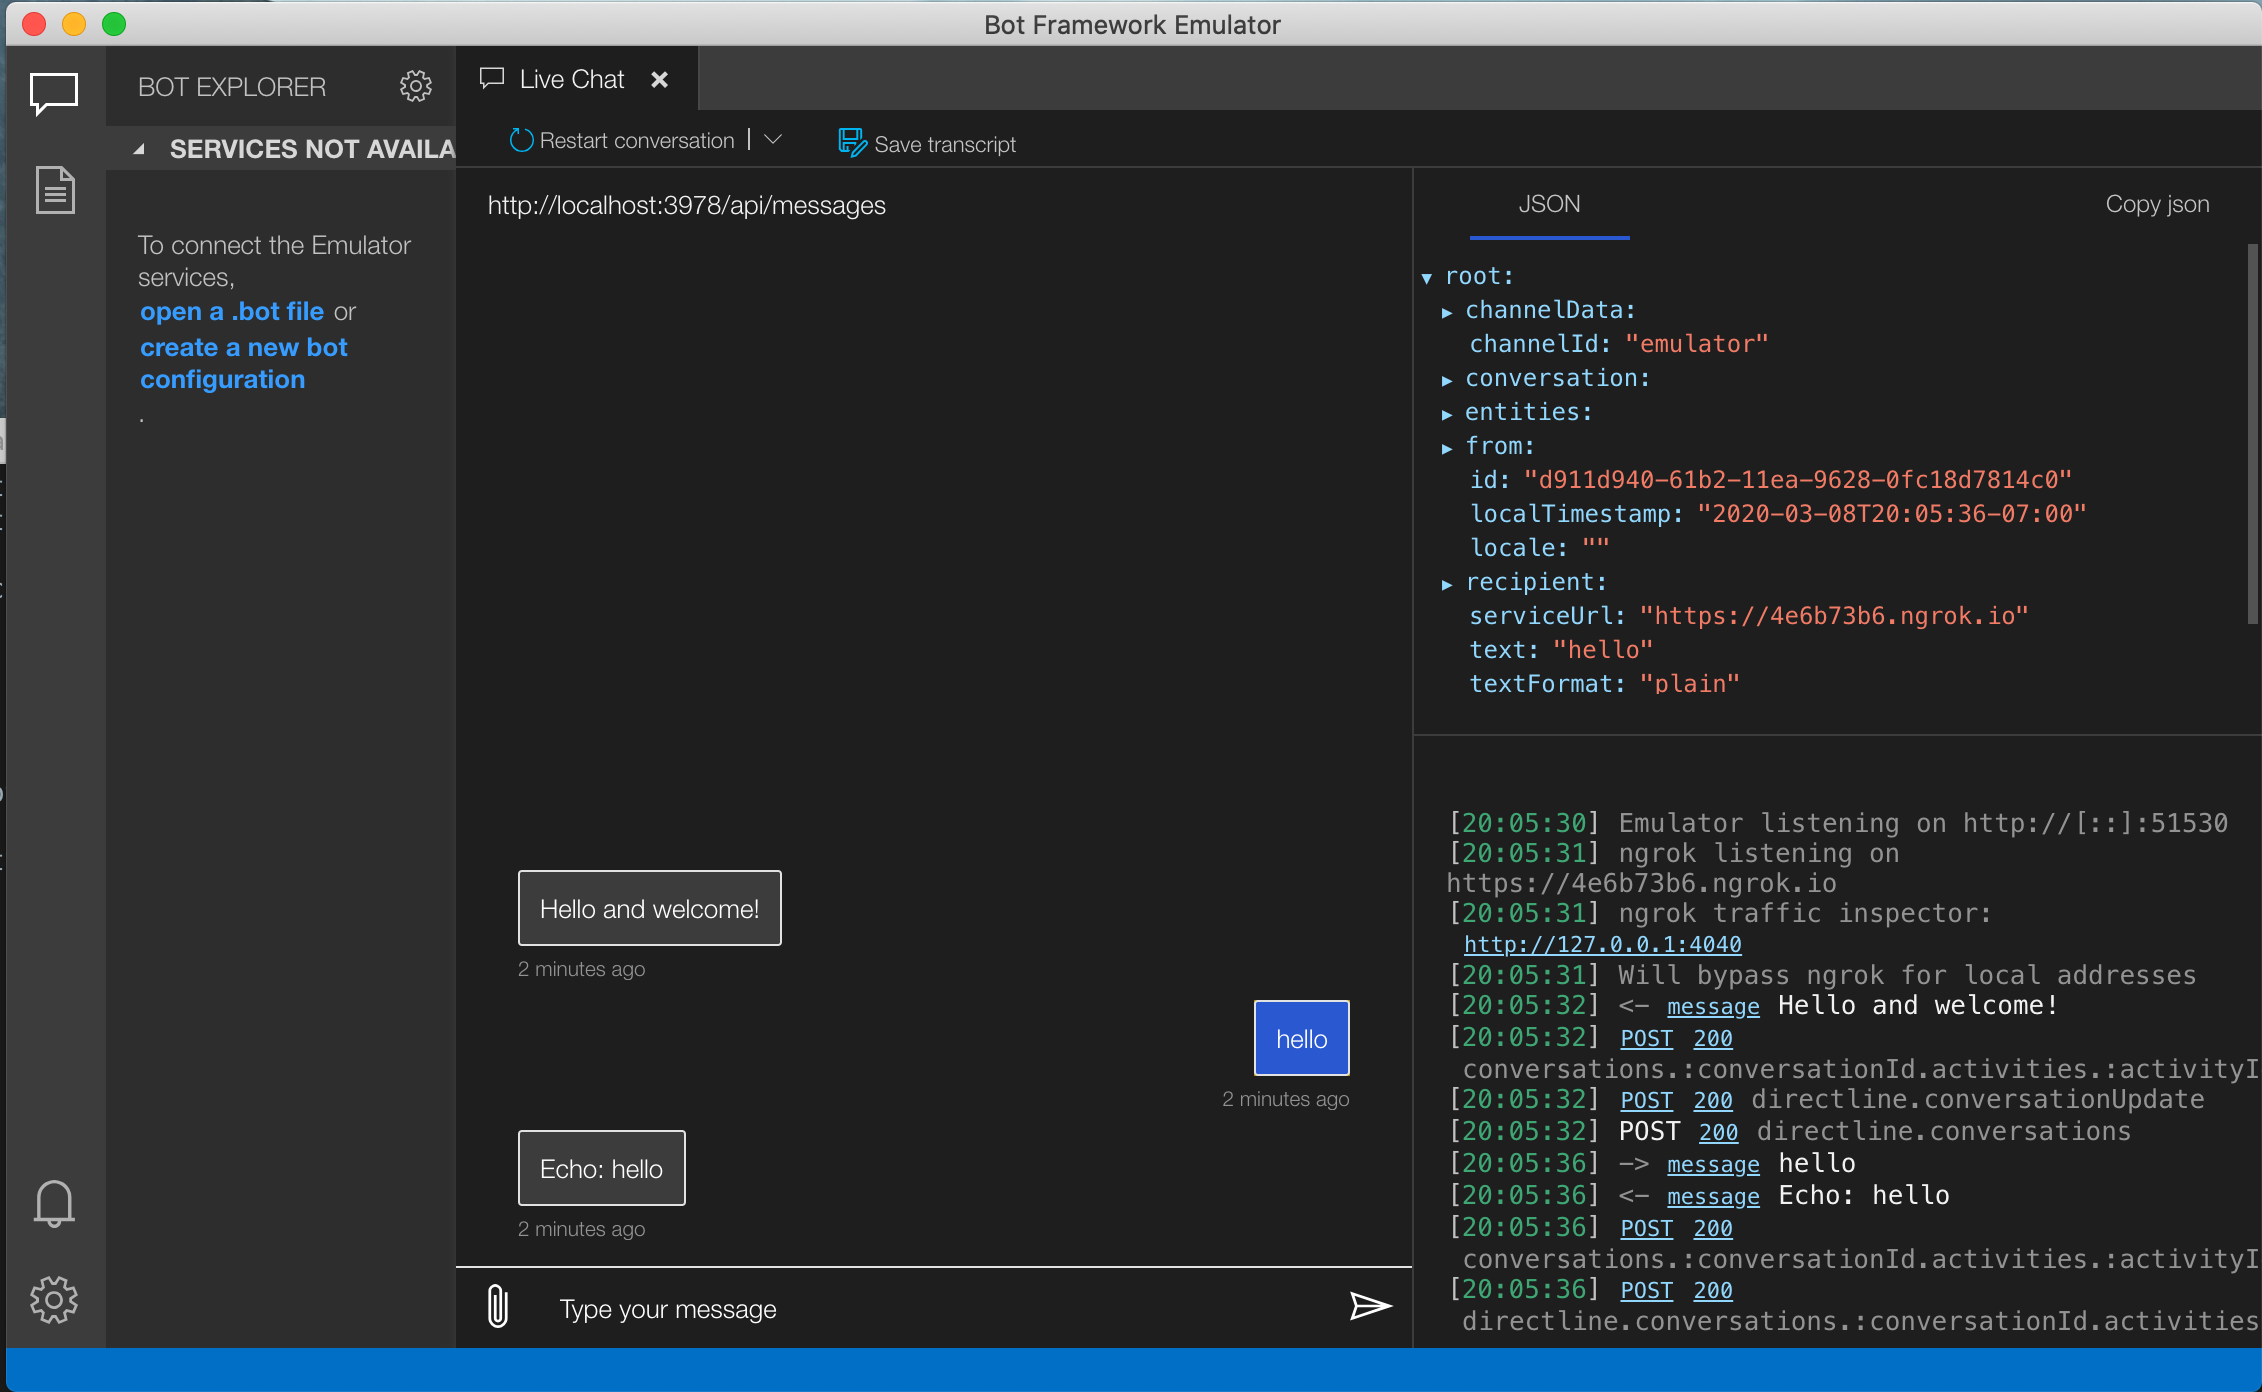
Now the bot starts running inside the container with the port 3978 exposed to the host. Launch the Bot Framework Emulator and connect to the bot using URL http://localhost:3978/api/messages and start the conversation with the bot.
In order to make any changes to the project, just open the folder in host machine in Visual Studio Code and start making changes to the project and it should be reflected back in the container.
Section #2 - Dockerize existing bot framework project
Open the terminal and navigate to your existing bot project
1
2
# Using bot builder samples cloned "using-cards" folder
cd 06.using-cards
Launch the container, using the below command
MacOS:
1
docker run -it --rm --name ${PWD##*/} -v $PWD:/usr/app/botfx -p 3978:3978 rjesh/botfx
Windows:
1
docker run -it --rm --name 06.using-cards -v /c/src/06.using-cards:/usr/app/botfx -p 3978:3978 rjesh/botfx
Install the dependencies
1
npm install
Once the dependencies are installed, you can run the project by using the below command
1
npm start
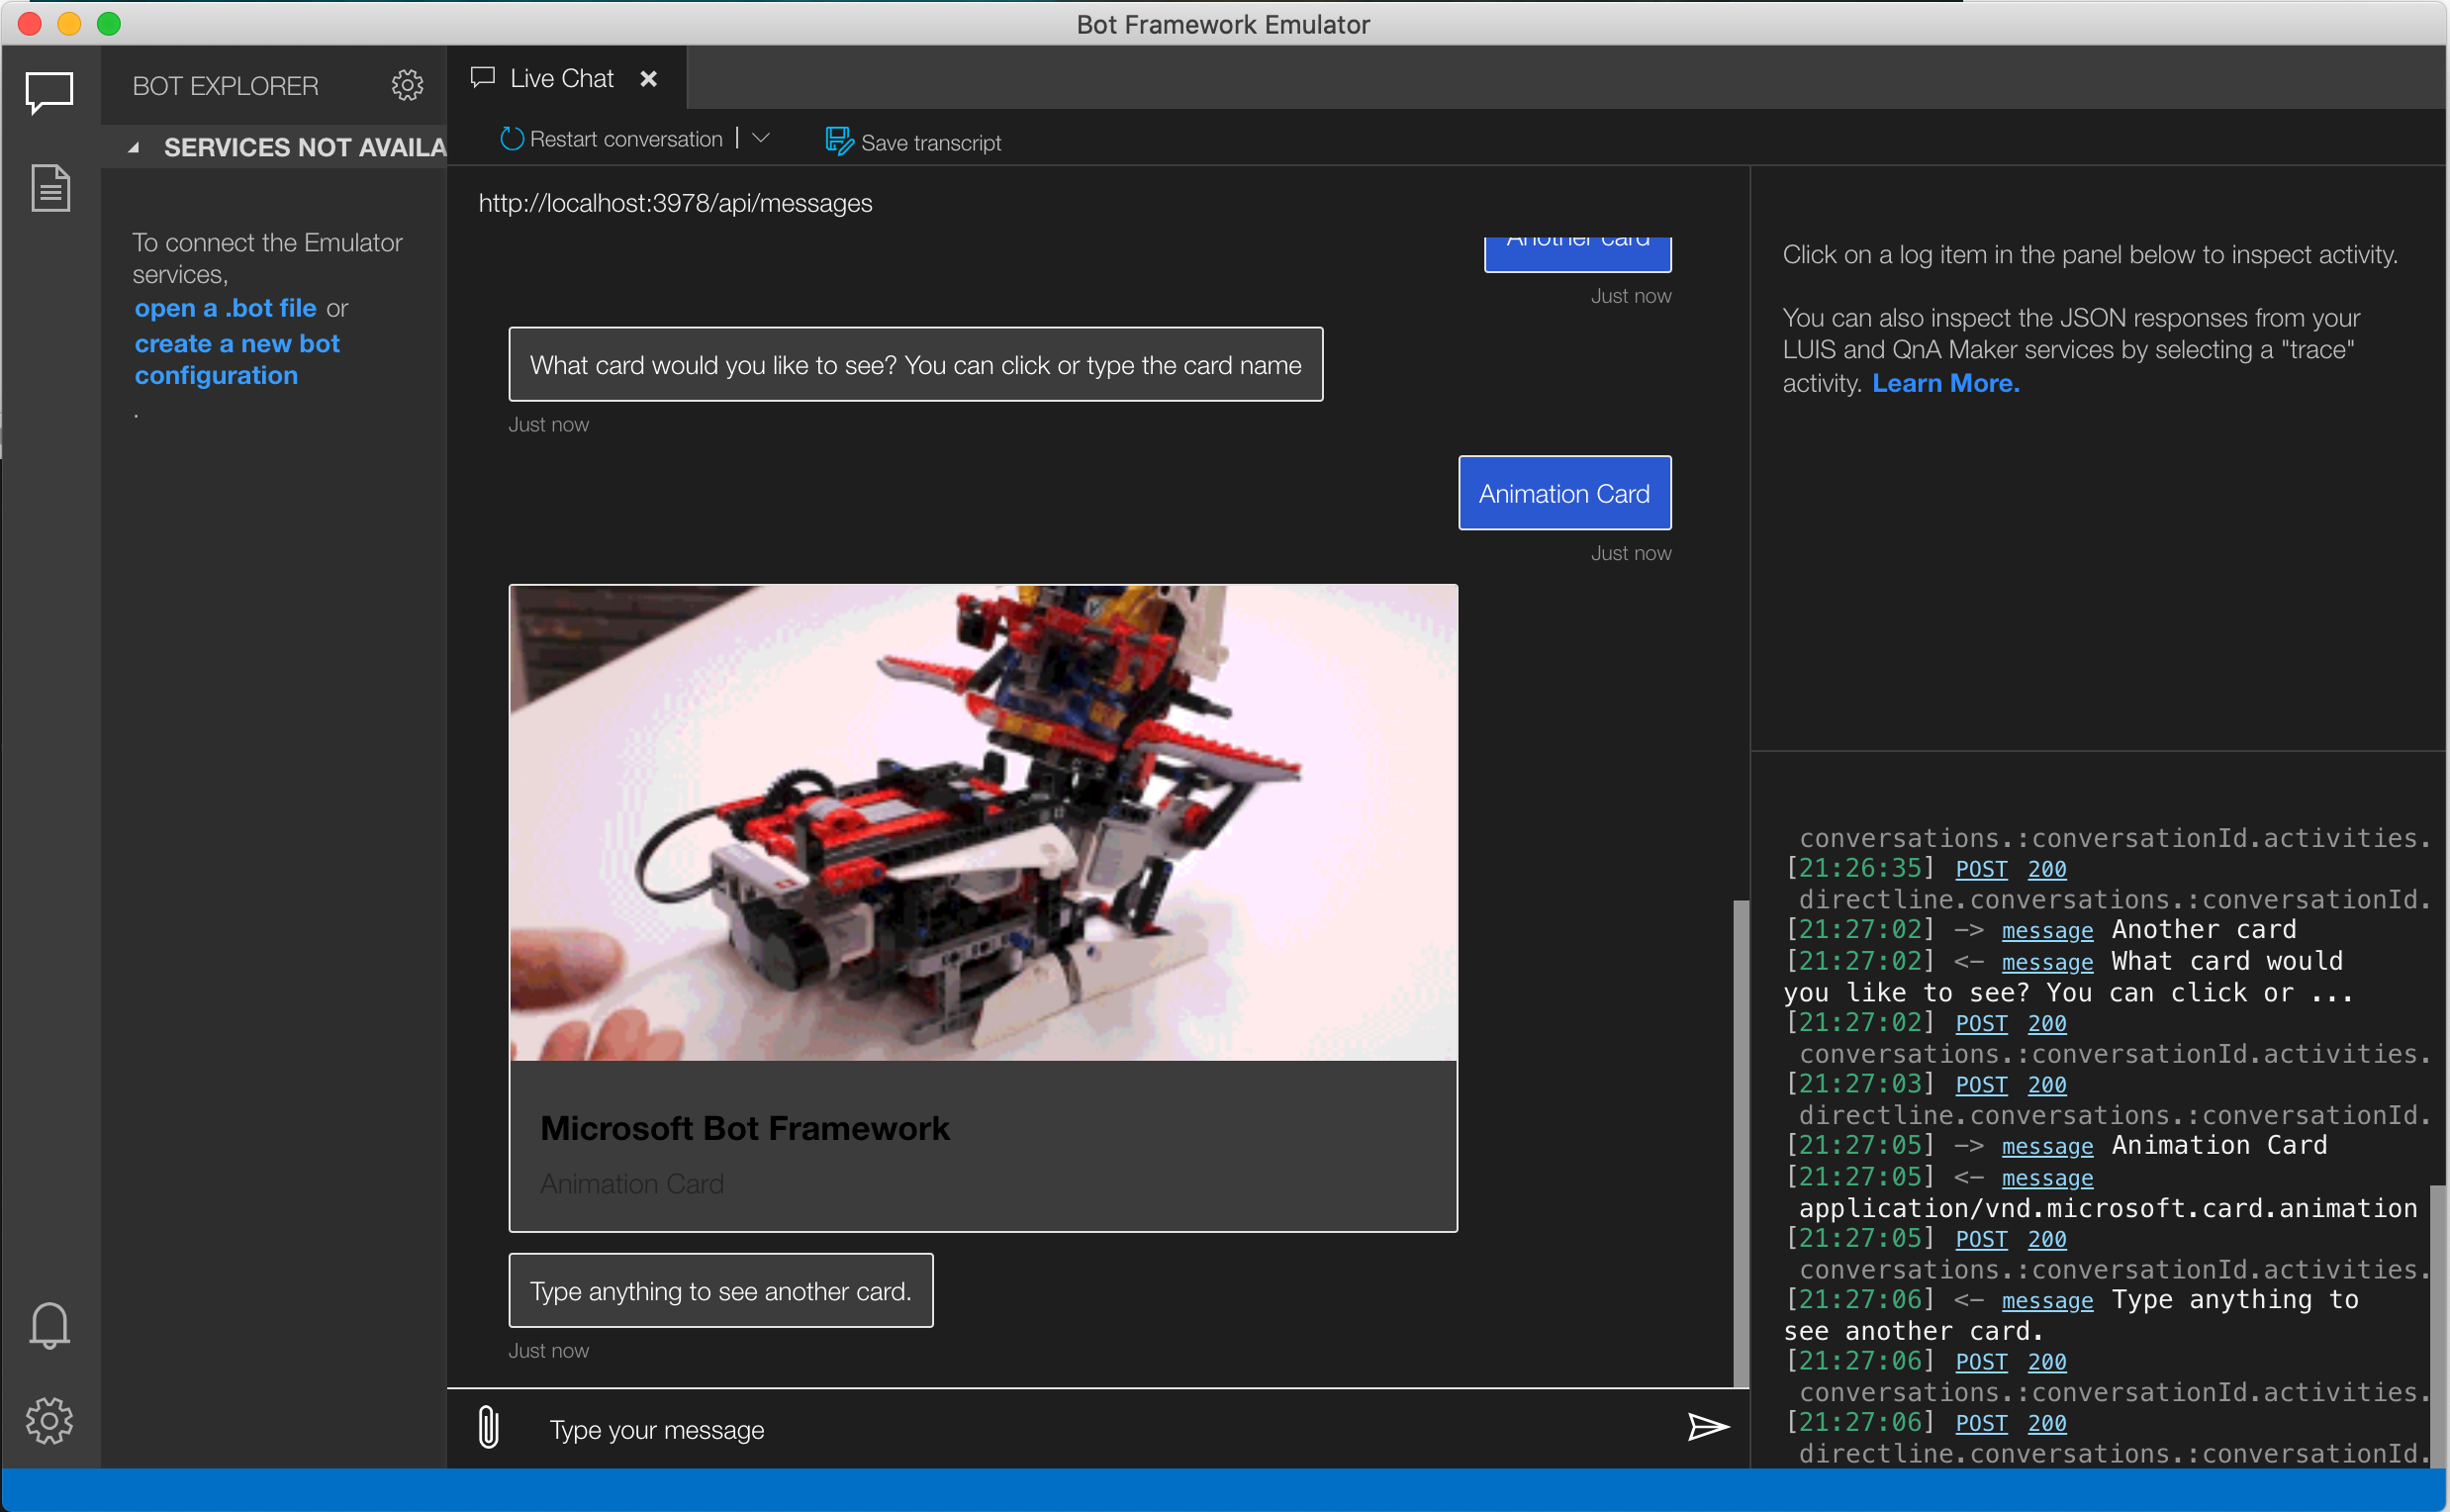
Use the emulator to start the conversation and to test the bot.
Enter exit in the terminal, to exit out of the container.
1
exit
Clean up
In order to stop the container first get container ID and then use remove it.
1
2
3
docker ps -a
docker stop [id]
docker rm [id]
To remove the images
1
2
docker images -a
docker rmi [id]
When running in Windows, make sure that the project folders’ drive is shared in Docker settings. Also the folder property advanced sharing, sharing has been enabled. In some cases you might need to use
npm install --force.
Photo by Lenin Estrada from Unsplash.